Showing posts with label Packages. Show all posts

Saturday, April 6, 2013

Package of Bees

 
Say hello to Rozina
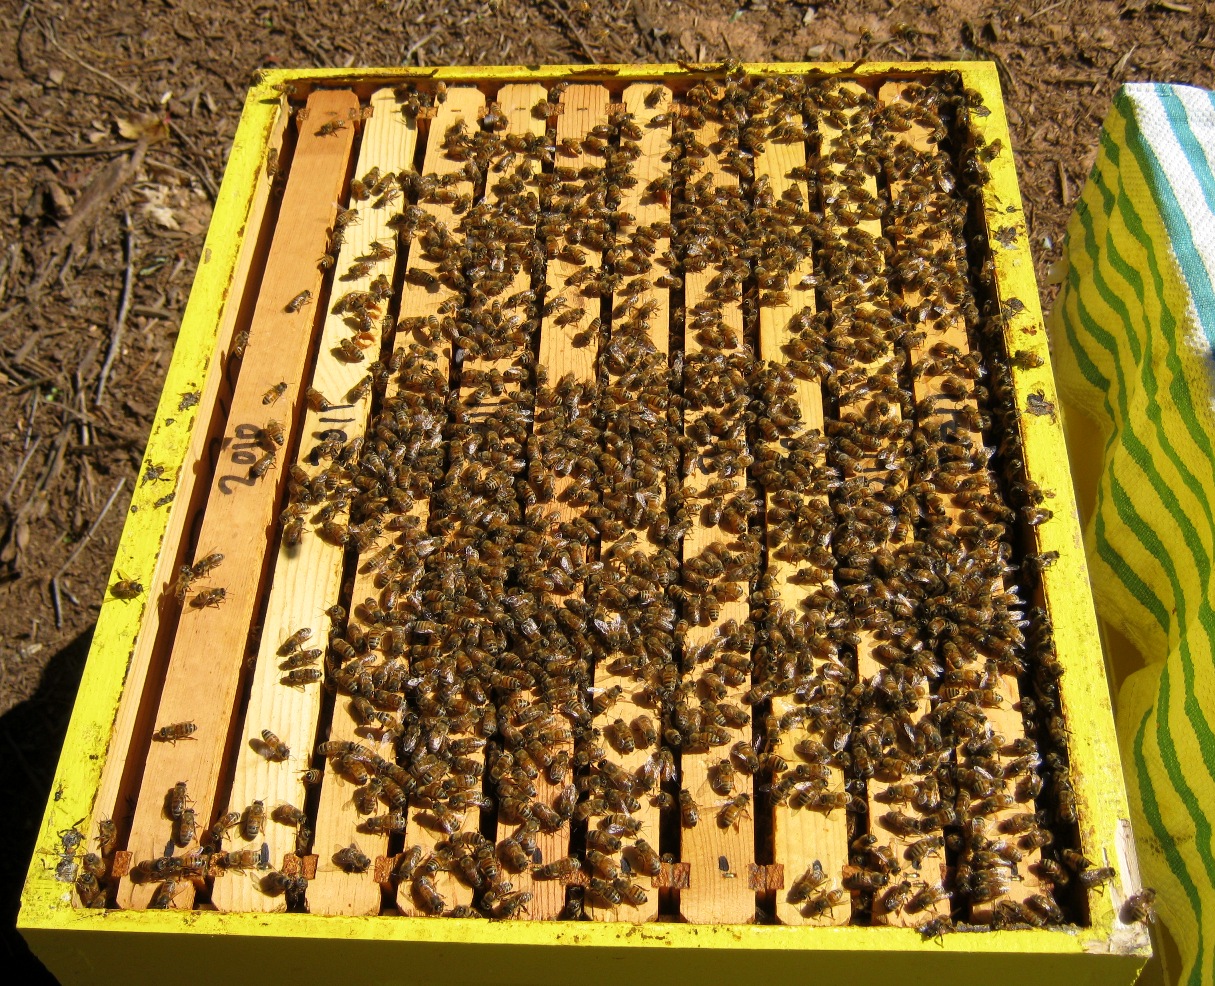
These arrived today.  Approximately 10,000 bees or 3 lbs.  They were packaged up on Thursday the 4th of April.  I plan to hive them Sunday evening; the 7th of April.  They will spend the interim in the kitchen.  They are being fed 1:1 syrup via spray bottle every couple of hours.  They look to be of regular size, not small cell, and of typical color.  I believe i saw a drone or two in the box.  There are some dead on the bottom but not much.  All in all the package looks good.

These bees will be hived in 2, 10 frame medium boxes.  Those boxes have 10 frames filled with pollen & capped honey.  The other 10 frames are fully drawn but mostly empty.  The bees will start off with excellent resources and plenty of empty cells for the queen to lay eggs in immediately.  I hope the bees will brood up quickly enough to provide honey in the first year.

Once the brood nest is filled and of great size the current Queen will be removed.  That way the bees will make a new 'local' queen with a better chance of winter survival.

____________________☼____________________

Tuesday, October 18, 2011

Hive Inspection 10/16/11

HELÉNA & MELISSA
Sunny
73°F

Heléna looks great.  Lots of brood, honey, & pollen.  A few SHB's but they're everywhere now.  Heléna was the last Georgia package i will ever buy.  Lots of people around here are blaming the Georgia apiaries for transporting the SHB to us in out bees.

Top Box DHB2: frames
1 - Solid honey
2 - Honey & backfill
3 - Honey , backfill, brood
4 - Honey & brood (eggs) - QUEEN (marked)
5 - Honey & brood
6 - Honey & brood
7 - Honey & backfill
8 - Honey & backfill
9 - Honey, backfill, pollen
10 - Honey & backfill

Bottom Box DHB1: frames

1 - ½ Drawn, honey, backfill, empty
2 - 4/5 Drawn, honey, backfill, SHB (2)
3 - Honey & backfill
4 - Honey, backfill, pollen
5 - Honey & backfill
6 - Honey & backfill
7 - Honey, pollen, backfill
8 - Honey, pollen, backfill
9 - Pollen, honey, drone cells (2)
10 - Pollen & drone cells (2)

Heléna's Bottom box
Her population is where i like to see it at this time of year.  It was mighty high a month ago but they never got honey bound then swarmed.  This is actually the only package i have.  The previous one didn't make to last Winter.  She requeen via swarm a while back.  The new (local) queen has done well.  This colony also had Myrina's nuc combined into it.  Which did well and really helped the Georgia girl.

Queen Heléna - She's a quick one, hard to photograph

- - -   - - -   - - -

Melissa has a mother and sister in the neighbor's apiary.  Both are doing very well.  Melissa could be doing better though. Too many empty frames.  These frames weren't empty before.  It happened as the bees relocated the stores around the brood nest and the cool weather has caused some clustering.  Which may have used up some the stores. 

Top Box DHB2: frames
1 - empty, backfill, honey
2 - Honey & backfill
3 - Honey & backfill
4 - Backfill, honey, brood
5 - Brood (eggs), honey, backfill
6 - Brood, honey, backfill
7 - Brood (eggs), honey, backfill- QUEEN (marked)
8 - Brood, honey, backfill
9 - Honey, backfill, some brood
10 - Honey, pollen, backfill

Bottom Box DHB1: frames

1 - empty
2 - empty, ½ drawn
3 - empty
4 - empty, ½ drawn
5 - empty, ½ drawn
6 - empty & backfill
7 - Backfill, empty, 3/4 drawn
8 - Backfill, pollen, brood
9 - Pollen, backfill, 3/4 drawn
10 - Pollen, honey, backfill

Empty frames but lots of bees
Her population seems fine.  The bees are busy every day.  Why the bottom box is so light i don't know.  I don't want to break her down like i did Myrina.  Nor do i want to combine the two of them.  I'm in this stage where i want to maintain the most amount of genetic diversity in the yard.  I think I'm in denial about losing a strain.  To combine Myrina & Melissa would mean one of the queens has to go; it would be Myrina.

To remedy her issues i will exchange her empty frames with ones that have been filled with syrup.  It will add some moisture to the hive in cold weather but that location is a dry one.
 
The framed comb from beneath a medium frame
The bare comb that was framed with rubber bands did OK i guess.  All of it was attached to the frames but none of it was completely drawn out.  It worked but the bees ran out of time it seems.

Queen Melissa
Seven frames of brood is the best in the yard.  She really means to make it.  With enough stores i wouldn't worry but she'll need some help.

*_____________________________☼______________________________*

Saturday, May 7, 2011

Heléna - the Forth Hive

The Package showed up on Thursday the 5th.  Today they were hived without any problems.  The bees seem to have accepted their new queen.  She came unmarked.  I'll mark her in a few weeks after they've settled in.  for now the bees are taking to the hive well enough.  They were making orientation flights as soon as i poured then into the hive.

Heléna being Hived
It would have been better to hive them tomorrow but rain is in the forecast.  These bees were starved though.  When I poured the syrup into the HTF they all but swarmed the syrup.  It took a few minutes to get the bees out of the HTF just to close it.

Typically one is supposed to feed the bees Fumagilin at this stage to fend off Nosema (dysentery).  I want to back away from all these chemical treatments so i didn't.  They had Apple Cider Vinegar and Thyme oil added to the syrup instead.  Those will help with both Nosema & Varroa without being too harsh.  If i don't see any signs of Nosema I'll not use the Fumagilin at all.  So far no colony has been given any this year.

This hive is all foundationless.  They should draw it out faster so they will have brood sooner, so everyone tells me anyhow. 

* ____________________________________________________________*

Wednesday, April 28, 2010

Inspection 4/28/10

New Hive (Duchess)
71 f
Partly Sunny

They finished their first gallon of 1:1 medicated syrup the previous day.  I added another 1/2 gallon of unmedicated then, yesterday evening.  There were a handful of drowned bees in the HTF then but none today.  I check each day now to see how fast they're taking it. 

Once the HTF was off I was able to see that the bees were working in frames 4 through 7.  I pulled the cage frame and saw the Queen had been released.  They had not built too much comb around the cage.  It came out with only a small tug.  The rest of the frame had been mostly drawn out & somewhat filled with pollen & syrup or nectar.

Bees working 4 through 7
(click to enlarge)
-

Almost capped syrup at the top

Frames 4 through 7 were close to being completely drawn out.  Beautiful white wax.  They had also capped a small patch of syrup on frame 4.  The frames were a mix of new wax & old wax.  The bees used the old wax from the rewaxing effort to build the comb down on the lower half of the frames.

Frames 5 & 6 is where the eggs were at.  Closer to the top of the frames mostly.  There was also pollen & syrup on the ends.  The bees obscured the view but I'll say half of the typical brood nest area had eggs on each frame.  The Queen was on frame 5.  Busily laying eggs.  She looks OK and the workers are taking care of her.

Queen & eggs

Frame 7 is the Drone frame.  It has been partially drawn out but the queen has not got to it yet.  In the meantime the bees are storing some syrup on it.  I'd love to use these drone frames in the honey suppers.  The cells are much bigger than normal brood cells.  So more space would be dedicated to honey than comb wall.

On frame 6 there was 2 Queen cups.   At first I thought they were Supercedure cells.  Since then I have learned that they are only 'Cups'.  The bees regularly construct Queen cups.  So if something happens to the Queen they can quickly form a emergency Queen cell.  As much as they are always making these they are also tearing them down.  So there should always be some somewhere in the hive.  I mentioned this to one of the Bee club leaders.  They thought the stress of being shipped was enough to cause the bees to make these so soon.  As of now it doesn't seem to mean anything is wrong with the colony.  I'll be watching for any other signs though.

Queen cup.  Currently filled with pollen

The colony is looking good.  They are building up the comb & population.  They may need another hive body in the next week or two.  She doesn't have a name yet because it's too early to know what she's like.  It'll be 45 days, or so, until all the bees are daughters of the Queen.  Then I can get a good idea of what the colonies personality is going to be like.  I'd settle for calm & productive, but who wouldn't.

    Wednesday, April 21, 2010

    Package & Installation

    The Queen cage is a small cage containing the Queen and sometimes several attendants.  It is used to ship the Queen either individually or as part of a 'Package'.  

    Typically, there is a small hole at the end of the queen-cage for the queen to exit by.  It is plugged with a cork on the outside.  It leads into a larger hole filled with a bee candy stopper (corn syrup & sugar).  The queen is trapped in a compartment on the other side of the bee candy.

    To release the queen I remove the cork exposing the candy.  Then set the queen cage into the hive between 2 frames.  After which the bees are added separately.  The bees eat through the candy.  Which in turn releases the queen.

    While the queen is waiting to be released the bees feed her through the screen.  This process gives the bees time to acclimate to the presence of their future queen.  Otherwise they could reject her.
    ---   ---   ---

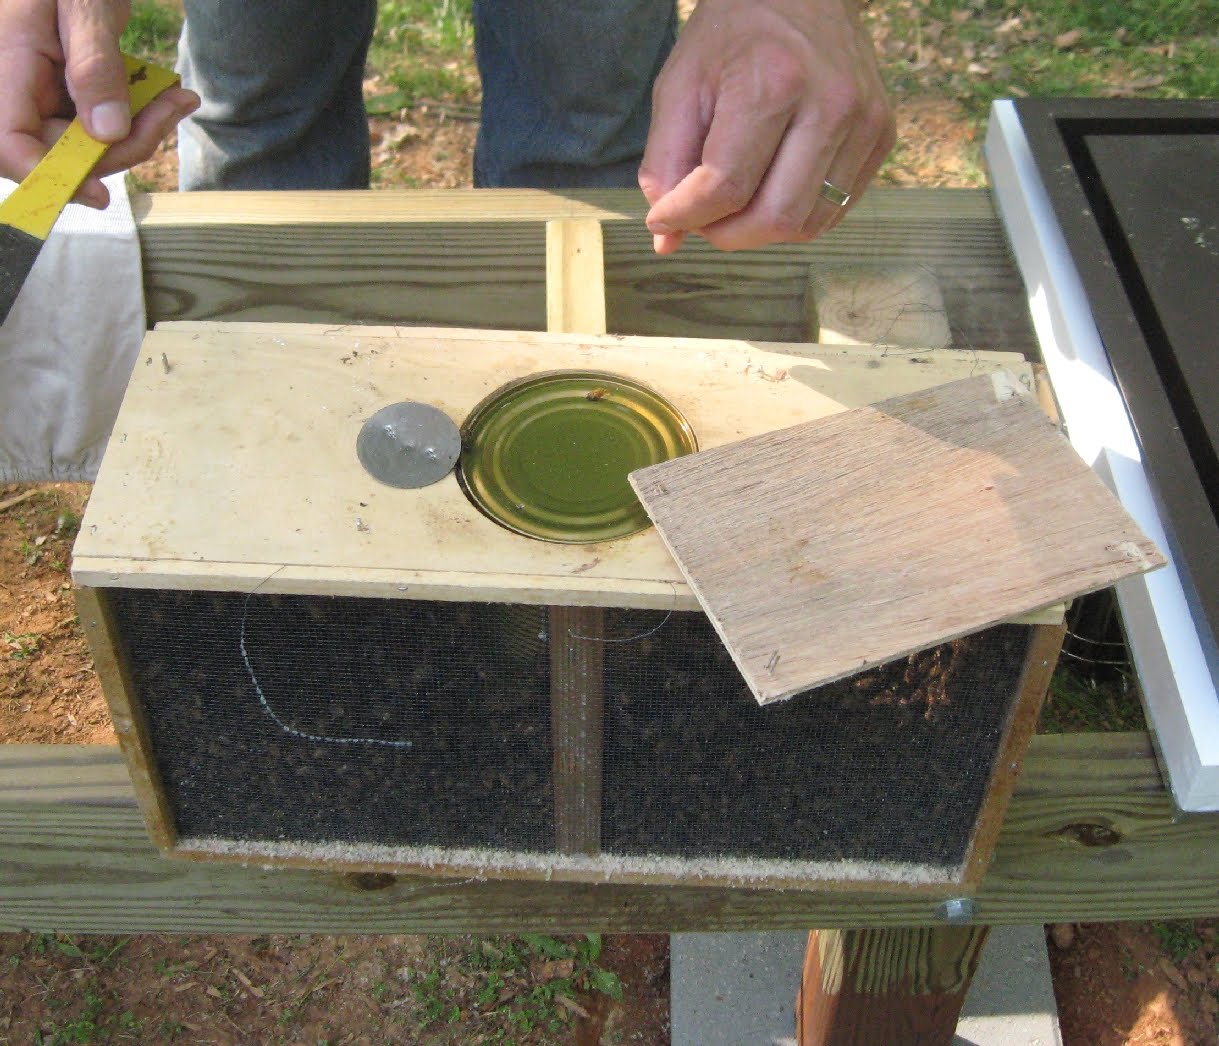
    This is the shipping box for the bees. The large can is filled with sugar syrup to feed the bees while they are in the box.  The small silver circle is a flange which is connected to the queen cage.  Before I remove either one, I spray the bees with a 1:1 sugar syrup. I also spray all of the frames with the same 1:1 sugar syrup solution. Then I tap the cage to knock the bees down to the bottom of the box.  After which I remove the queen cage and cover up the hole with the wooden plank.
    -
    Once removed the queen can be inspected.  There may be attendants with the queen or not.  In this case there is a handful but 2 are dead.  At this point the beek removes the cork covering the 'bee candy'.  The apiary these bees came from uses the tin disk that holds the queen cage in place instead.  So off comes the disk.
    -

    Now I punch a small hole through the bee candy.  This tells the bees they can free the queen by eating through the candy.  Some queen cages come with a nail attached.  My Wife lent me one of her sewing needles for this task.  Be careful not to stab any bees!
    -

    Now orient the cage so the top is up.  The top being the end with the bee candy.  Then attach a strip of wire or paper board to the side of the cagePaper board is what they make cereal boxes out of and just about everything else in a store that isn't wrapped in plastic (**Update** - use tin or plastic strips, or wire.  These bees chewed the paper board apart).  Make it an inch thick since the bees will be chewing on it.  Secure it to the cage with either a thumbtack or office staple. 
    -

    To hang the cage on a frame, again, use a thumbtack or office staple.  Remember candy end UP!.  the candy side is the exit out.  If it is facing the bottom and an attendant dies she will block the exit.  Then the queen will be trapped. Also make sure the screen is in a direction that will have better access to the other bees.  Perpendicular to the frames will do it. 
    -

    Now take the syrup can out of the big box and shake the bees into the hive directly over the queen cage.  Roll the box from side to side to get the bees out.  Then place the box by the front entrance so the few remaining bees can walk into the hive.  
    -
    When the bees slowly crawl up the frames toward the queen is a good sign.  If they quickly ball up around her is a sign of rejection.  This looks good.
    -

    After which I replace the outside frames and move all the frames back into the centered position.  Slowly!  Then I add the Hive Top Feeder filled with 1:1 sugar syrup medicated with Fumagilin.  I put on the inner cover & the telescoping cover.  Then reduce the size of the entrance.

    That's how I hived my 2010 Package!

    Tuesday, April 20, 2010

    Hived the Package Today

    We started out this morning by hiving my neighbor's package in her Bee yard.  We did everything that was shown to us at the club demo.  Her bees look good and all seems well.

    Afterward I got ready to repeat the task over in my yard.  The new package (Duchess) was a good impetus for making a new hive stand.  I put it in a new spot too.  The placement of the first 2 hives was poor. This new spot has lots more Sun and is better drained. The stand is 8 feet long and is 20 inches tall and will hold all 3 hives.  The package will be the first colony on it.  I'll move the other 2 over to it in the next month.  It has room for a fourth hive too. Maybe I'll catch a swarm or start a queen nuc or something.   Once all 3 hives are on the new stand I get rid of farmer Bob's old rickety stand.


     Myrina on the Old Stand in the background

    It was great to put all the new hive parts together on the new stand.  It's clean with fresh paint.  The newest house on the block.  I'm still updating Mary's & Myrina's equipment.  Frames are the slowest to update.  I can only take so many in a season.

     I'm trying the Drone frames this year

    Once all the equipment was down by the new hive I opened up the package.  The Queen cage was missing it's cork over the candy but no big deal.  This hole was covered by a piece of metal anyway.  There was some wax being built up on the cage & syrup can but very minor.  The Queen looked good but 2 of her 5 attendants had died.  I attached her between the 2 middle frames and poured in the bees.

    Queen (soon to be named)

    The bees clumped out quickly and many took to flying around the hive.  The rest slowly crawled up the foundation toward the queen.  They seem to like her as there was no balling.  I put the hive back together and added a gallon of 1:1 syrup, with Fumagilin and apple cider vinegar, into the hive top feeder.  Once closed up the bees stayed close to the reduced entrance.  After an hour I checked on them and saw what looked like Orientation flights by many of the bees.  Lots of good signs.

     Before
    -
    After

    For this hive I built the Screened Bottom Board, Vent box, & Telescoping Cover.  The Deep Hive body & Inner Cover were purchased from Dadant.  The only prep that was done for the package was rewaxing the frames & spraying then with sugar syrup.

    I don't have a name for this colony yet. As soon as she exhibits some of her personality she'll get one.  For now I call her the 2010 package.

    Saturday, April 17, 2010

    The Package has Arrived!

    Here is one Saturday morning errand I don't mind,

    3lbs. of tired & confused bees

    These came in today from Wilbanks Apiaries in Georgia.  They were packaged on Friday so we're looking at hiving them on Tuesday.  They will be sitting in the basement until then.  I'll spray them with 1:1 sugar water (w/ ACV) every couple of hours.  I hope the cat doesn't get to curious!

    Sunday, March 21, 2010

    New Colony Coming Soon

    Next week I'll order a package of bees through the Piedmont Beekeepers Association who is presenting the Beginners class. They will come from Georgia with a marked queen. Delivery date is currently near the end of April.

    This will be the first time I start a hive with a package. When I got my first 2 hives they were already established (unknown how many years old) and filled with wax, brood, pollen, & nectar (and nosema, varroa, & waxmoth in Mary). So I've never seen a colony start from the beginning. The best part is all the new wooden ware. With Mary & Myrina I had to start replacing parts piece-meal from day One. Neither of them has ever had all new parts.

    Things I must do first:
    1. Build & paint all wooden ware
    2. Select hive location & build stand
    3. Add Chronolog to Blog
    4. Read up on installing packages
    5. Pray it won't be raining when they show up.